Memory Blanket – For A Room Of One’s Own

Large memory blanket thrown over bed.

True, I have not blogged for quite a while. At least not here in my own space. And yes, maybe constantly producing content for others (which I do for a living) has blocked me from blogging. Being constantly “creative” made me feel a lot less creative. If you understand the feeling, let me know.

Anyhow, here I am because I want to share a long-time project with you that is now finished. The progress was well documented over almost five years on Instagram. Wow, five years, the time passes really quicker, the older you get 😂

It all started with yarn leftovers.a basket full of scrap yarns in many colours

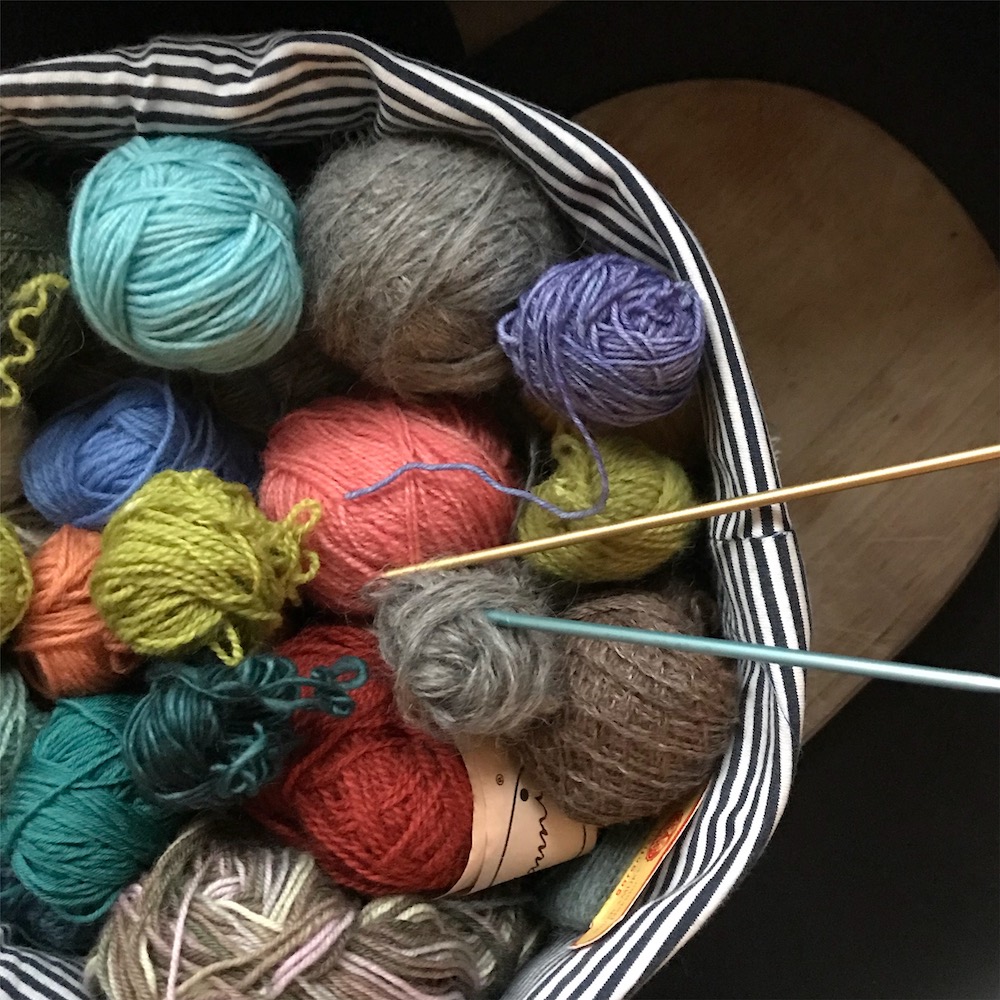
I admit I have a lot of them – and for multiple reasons, sustainability was one of them, another one was losing control over my stash – I decided to start a blanket. Since my colour choices are usually in the same colour range, I thought it might get a “quieter” blanket … but well, in the end, I got off track a bit. You will see.

Another reason: I started working on it in 2017 when, after separation, I move back to my old beloved flat with my kids – and my own space got really important to me. I love my room, it has morning sun, a window door to the balcony that you can open up. Breezy and airy. Of room of one’s own. Haven’t truly had that for a while. Yes, and I thought a crazy huge bedspread totally would make sense.

So I knit the first squares – and rows.

Two rows of mitred squares hanging over a black chair

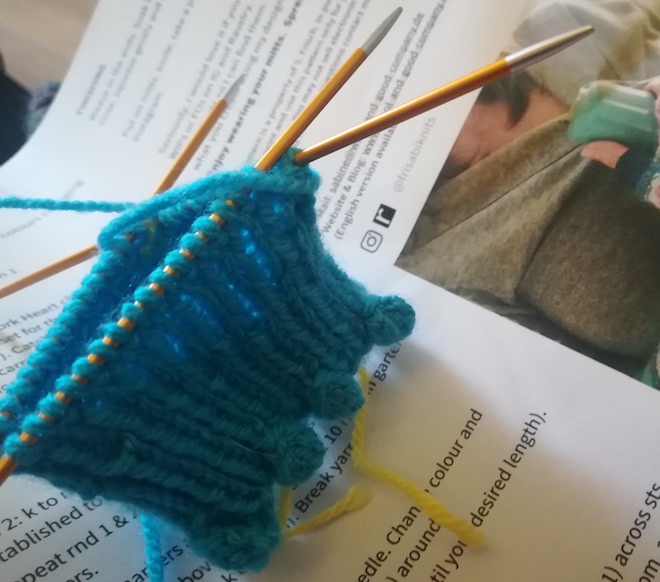
My Memory Blanket Square recipe

Cast on 33 with 3.00 mm needles
Knit one row
Row 1: K 15 sts, pm, cdd, knit 15 sts (two sts decreased)
Row 2: k all sts
Row 3: k to 1 st before cdd, cdd, k to end
Repeat rows 2 and 3 to the end, you will have one stitch left.

Tip: I did not bind the last stitch off but used a locking stitch marker to keep it live for the next square to come.

For the rest – check out tutorials like this own on Youtube.

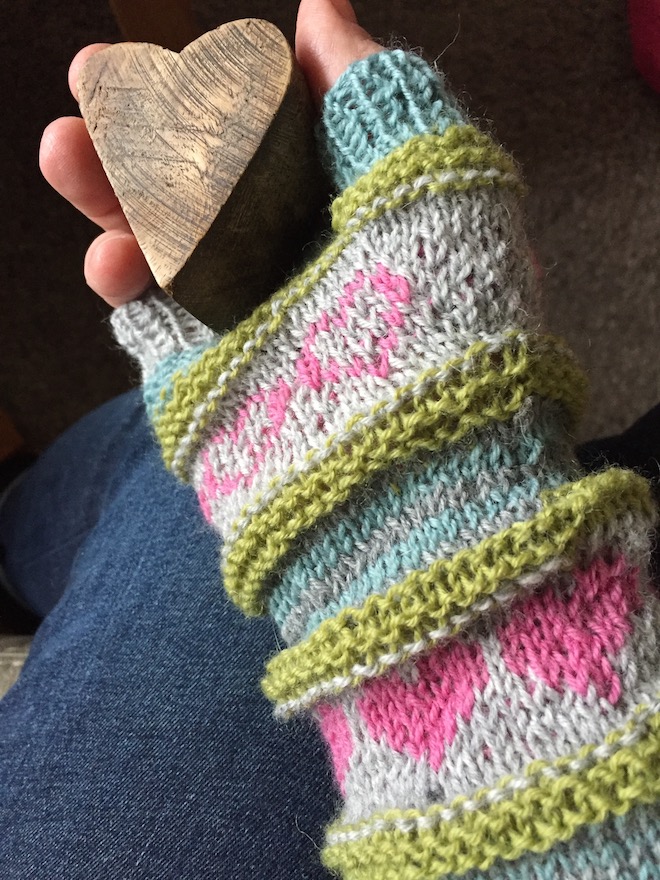
Double-check when you start a new square

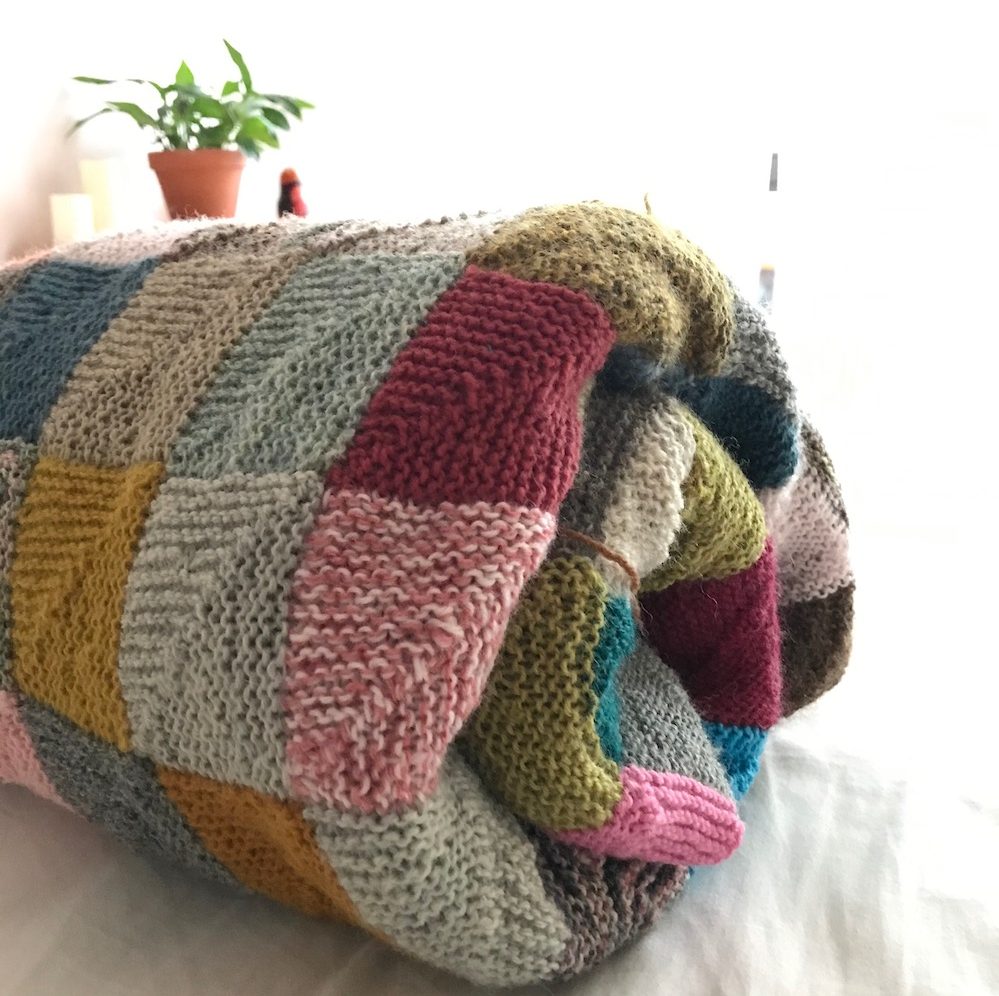
Make sure that the middle rib is always in the same direction. I missed it a few times, maybe watching TV. Can you spot it?Blanket covers bed 2 thirds. You can spot some errors. 
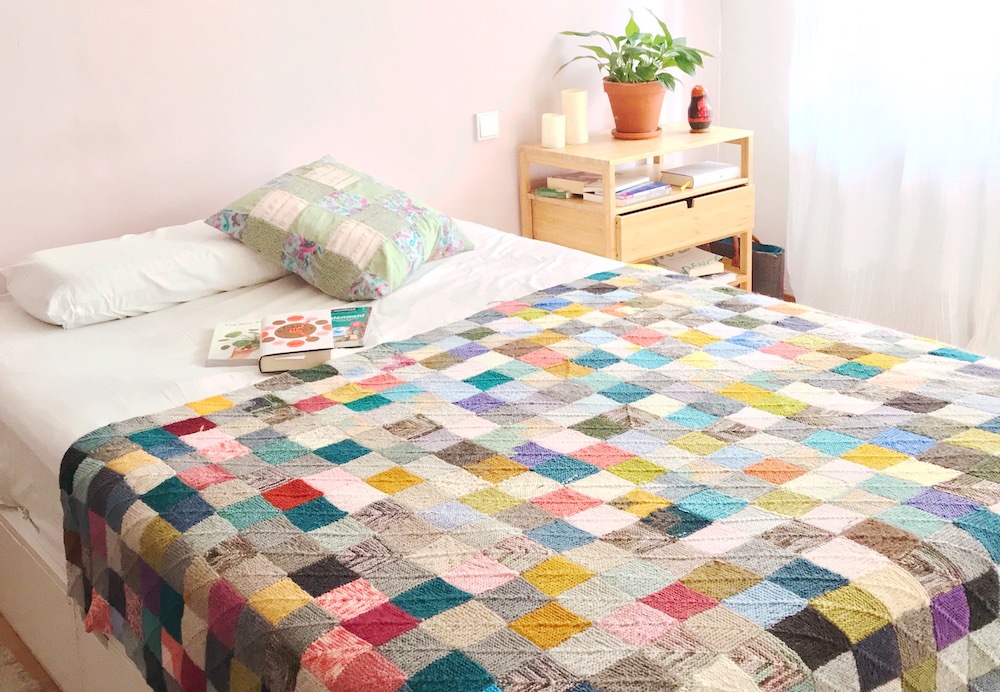
Well, I embrace imperfection.

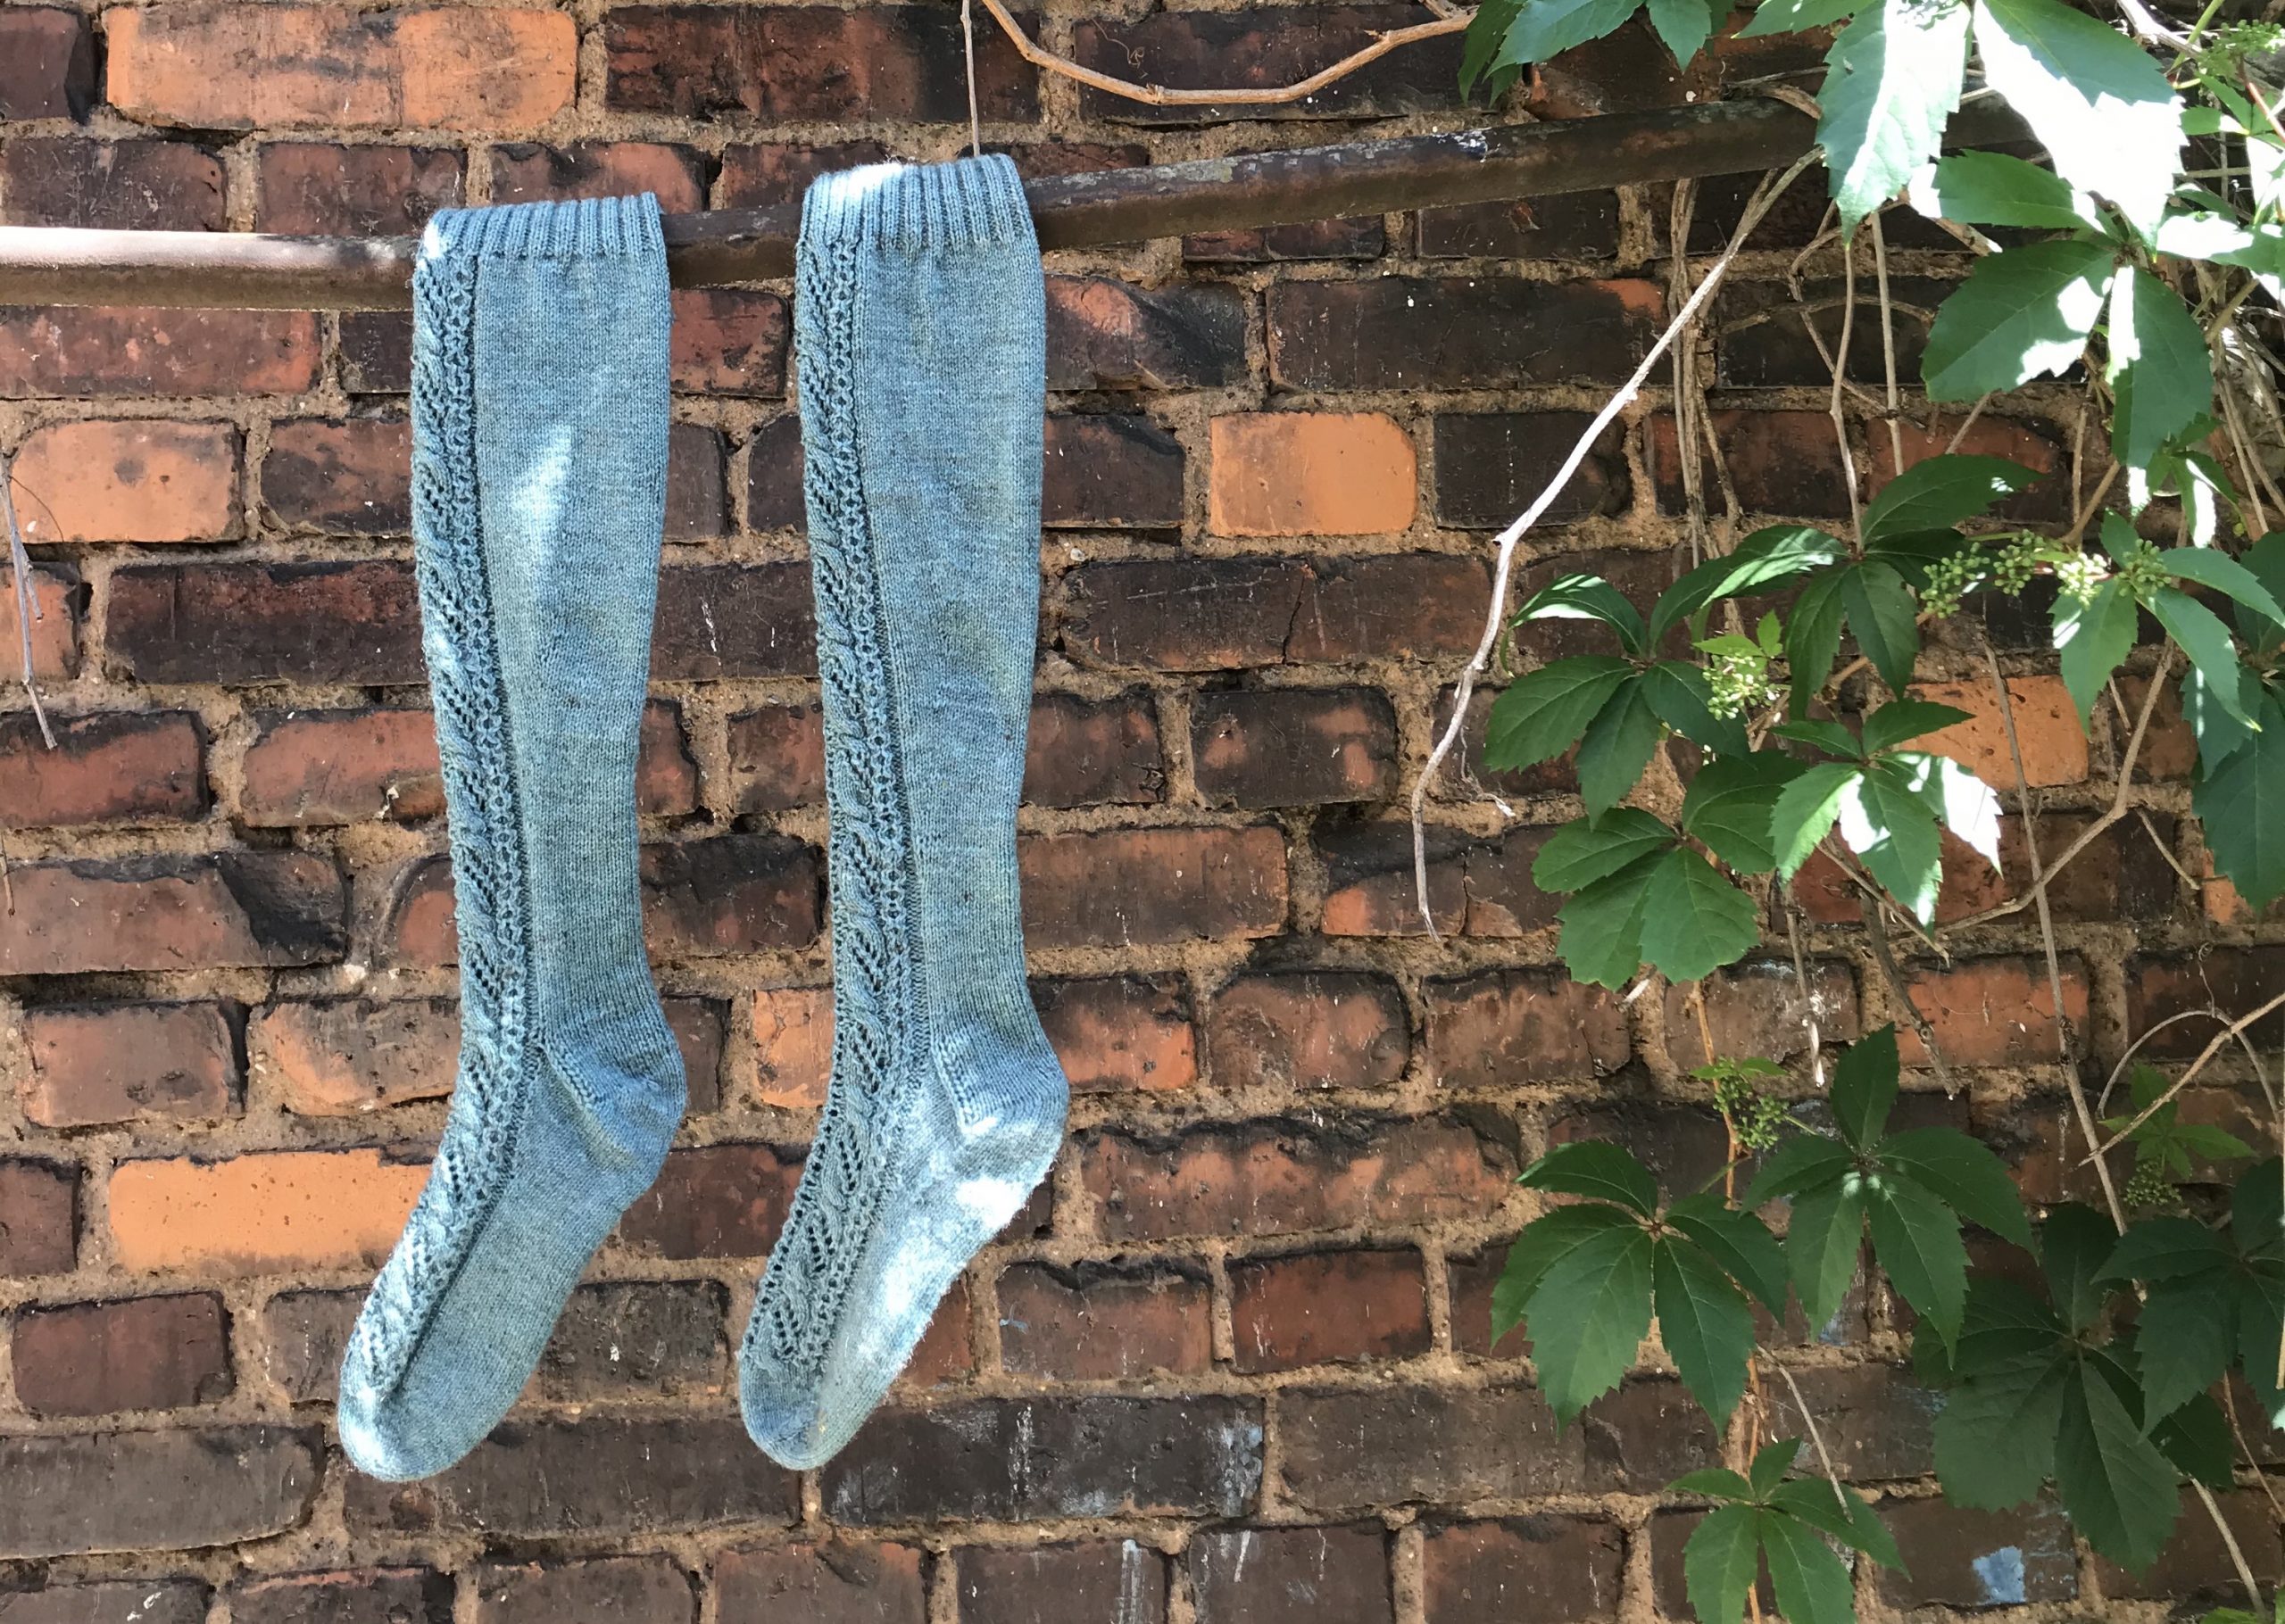
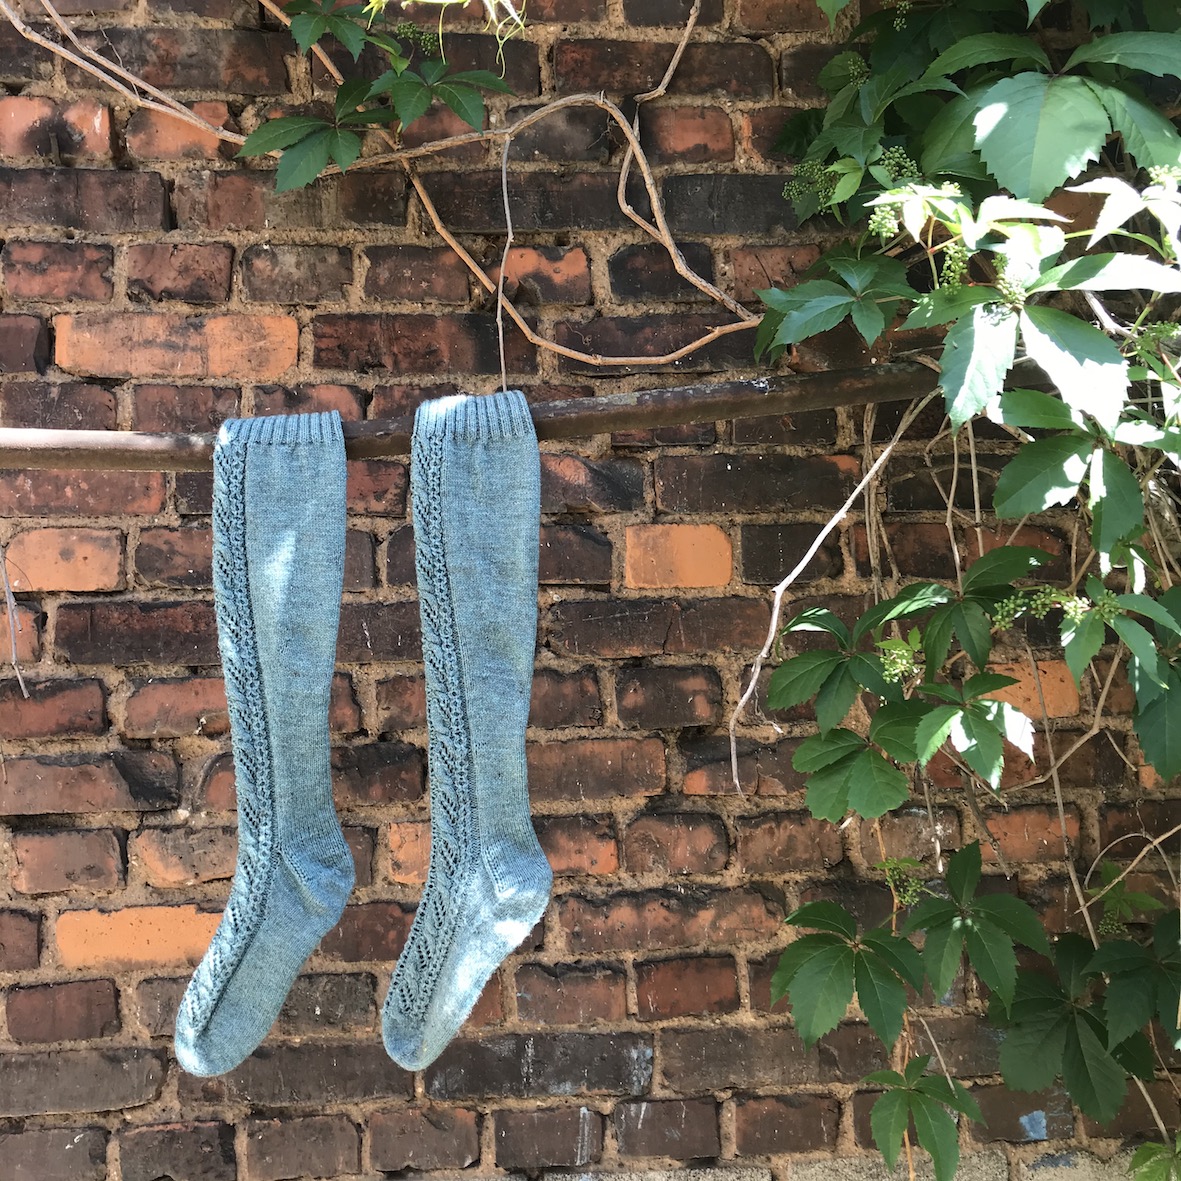
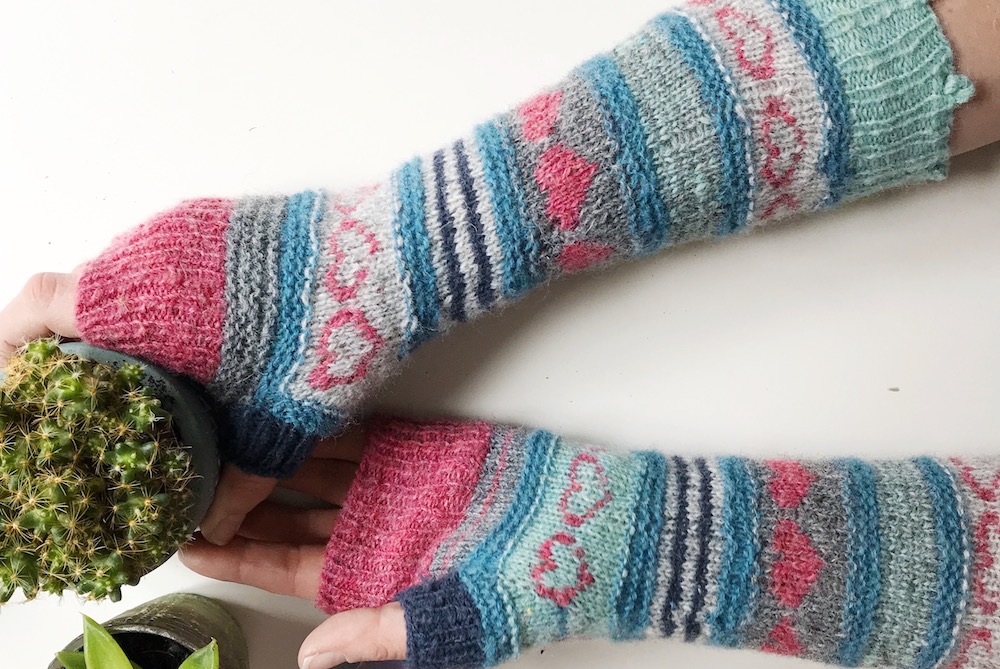
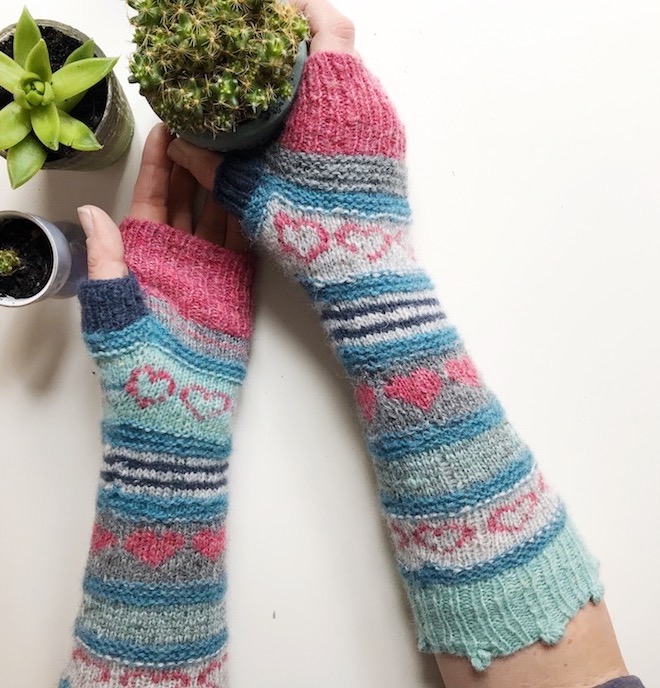
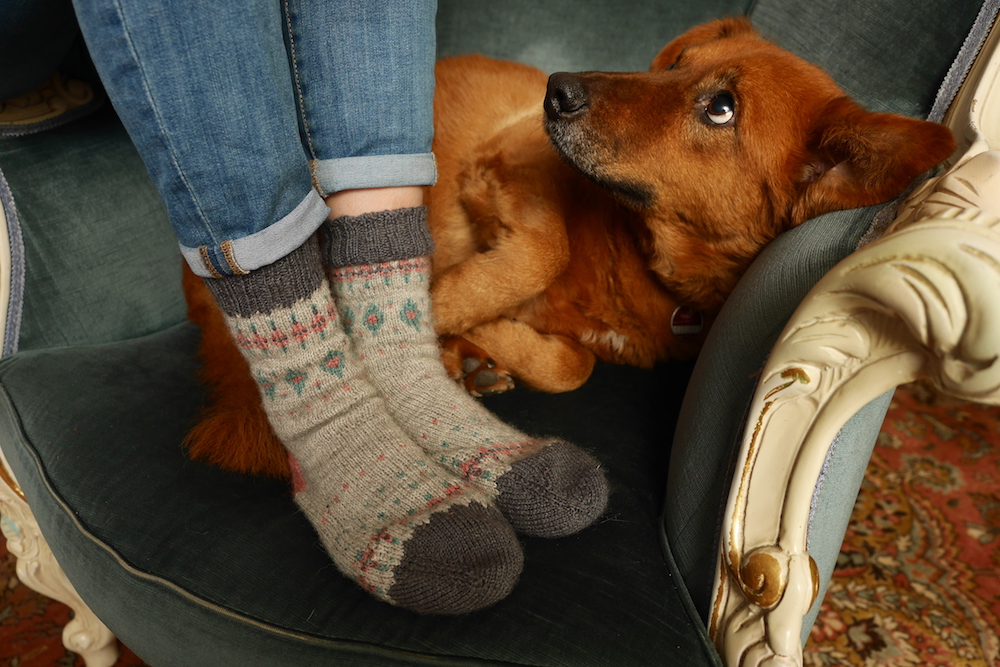
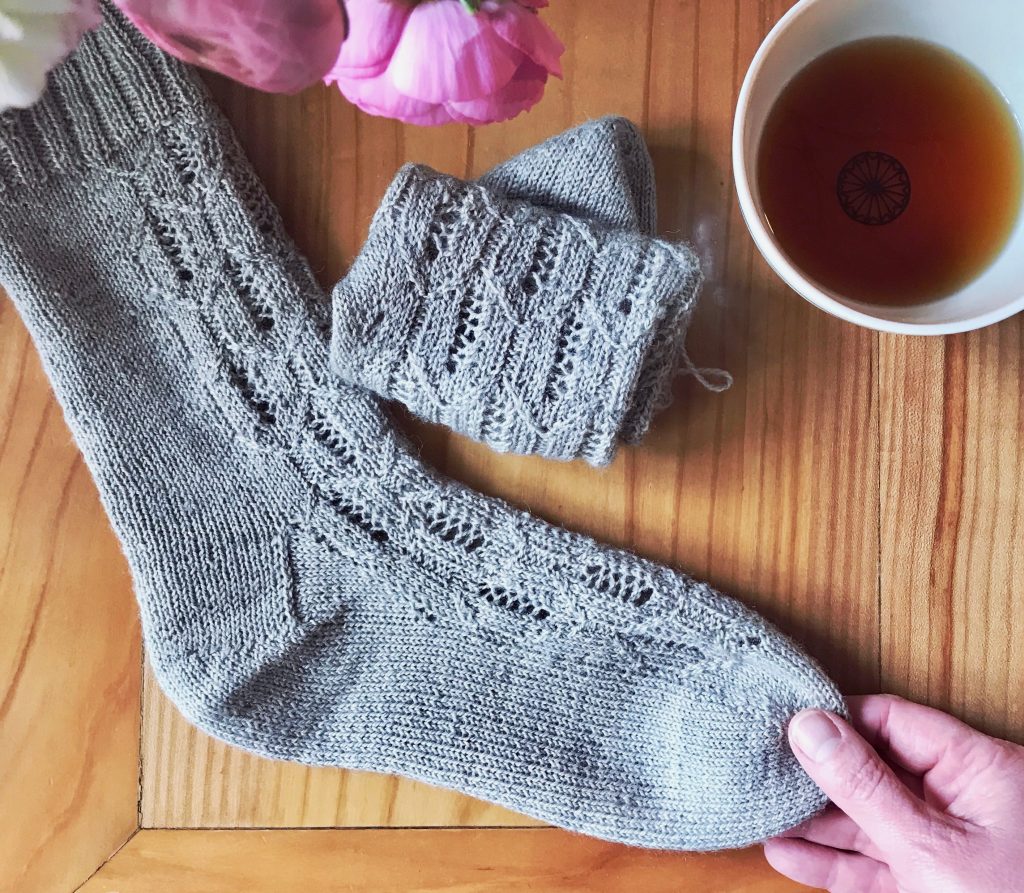
Whenever I finished a sock, I added a few squares:

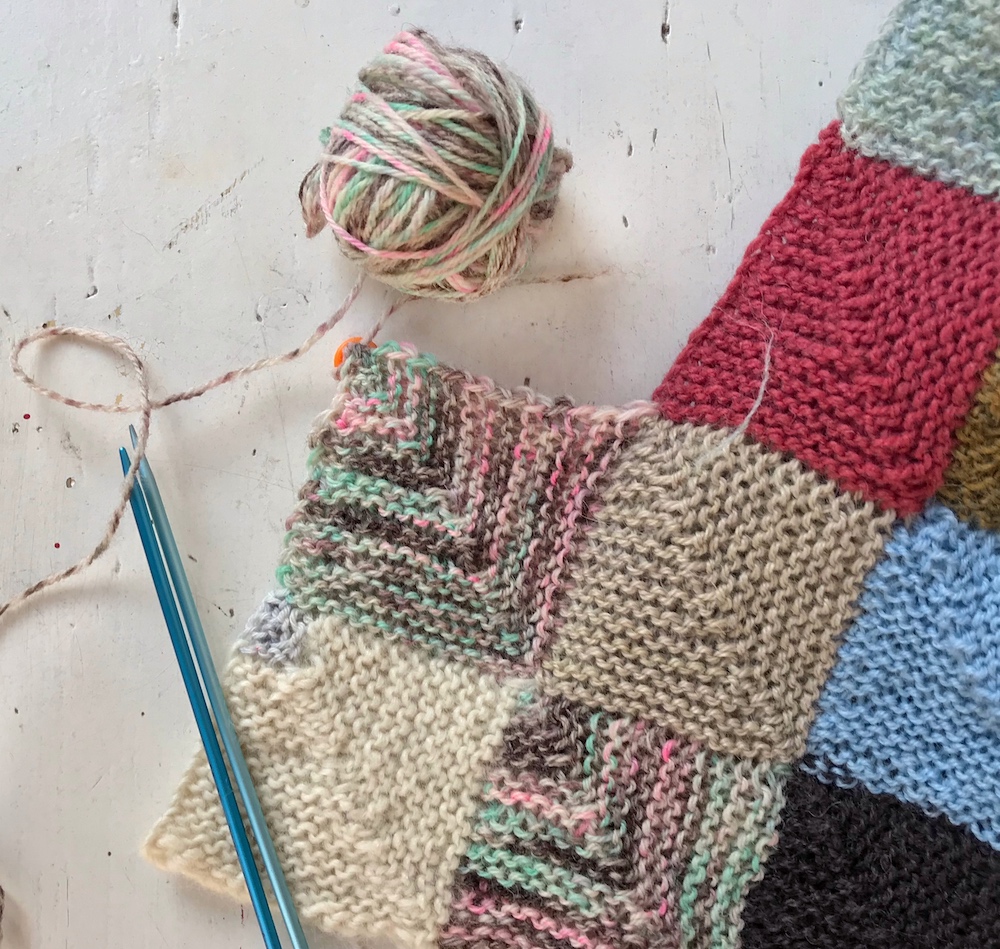
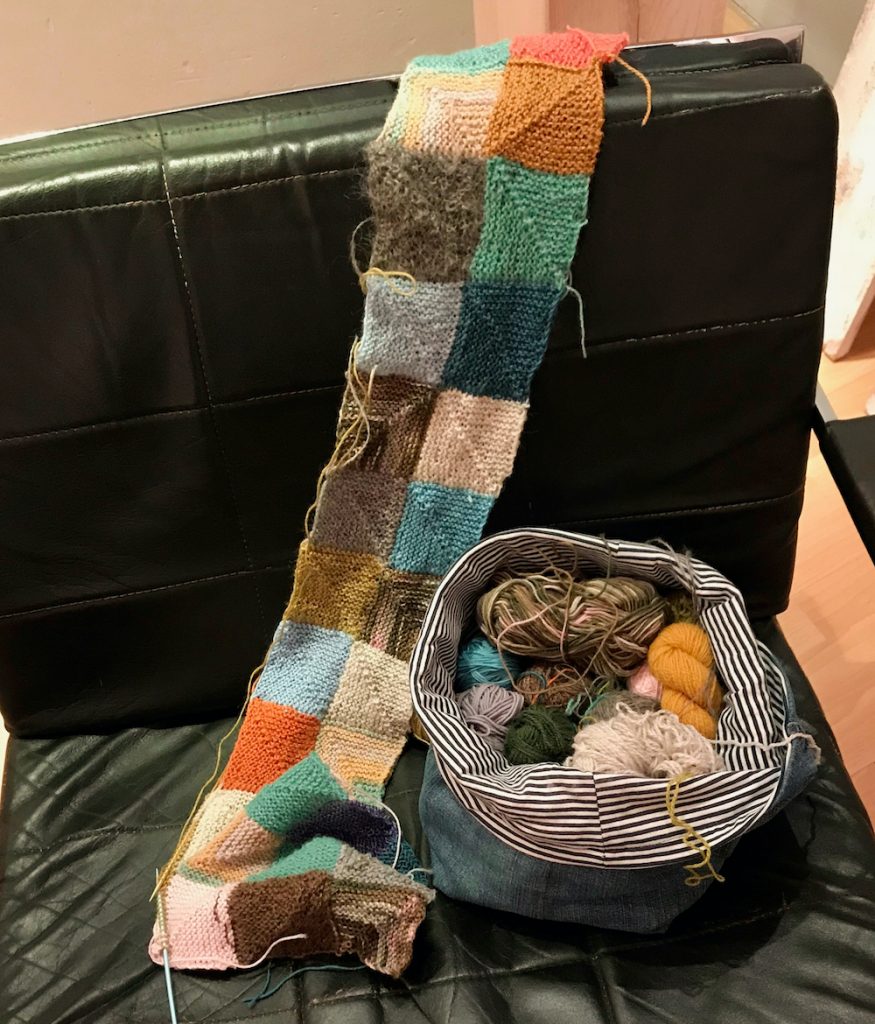
In the beginning, the memory blanket was a takeaway project that sat nicely in my project bag. It got bigger and was no longer a project to take away, but I could already use it as a blanket while working on it.

Covered with the memory blanket that I am still knitting on. you can see my feet in socks peeping out.

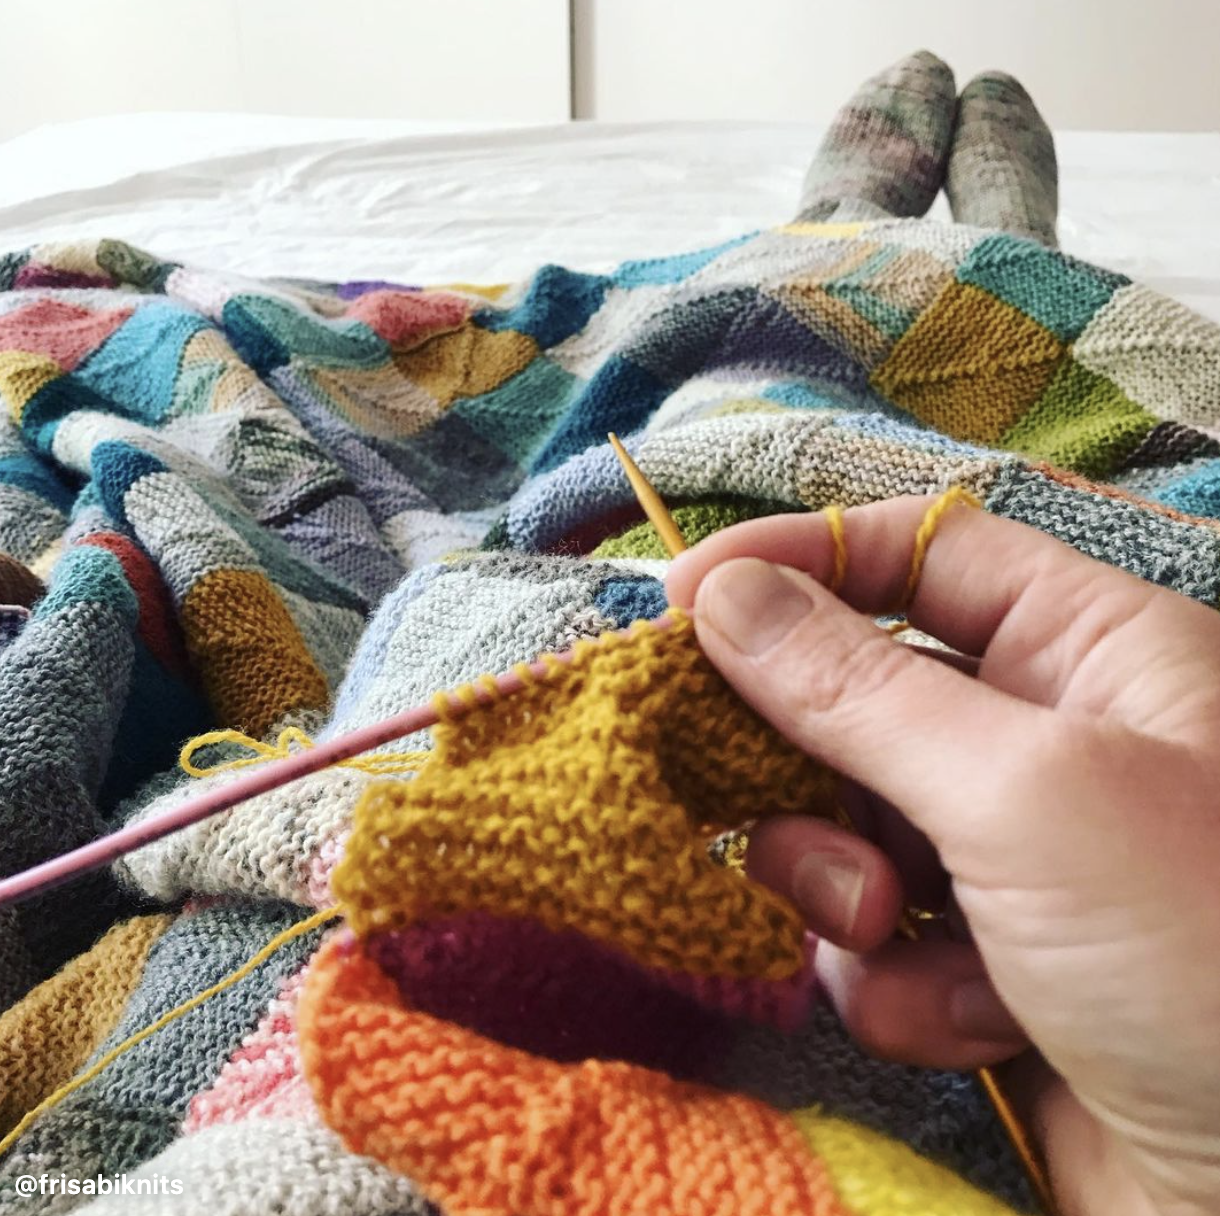
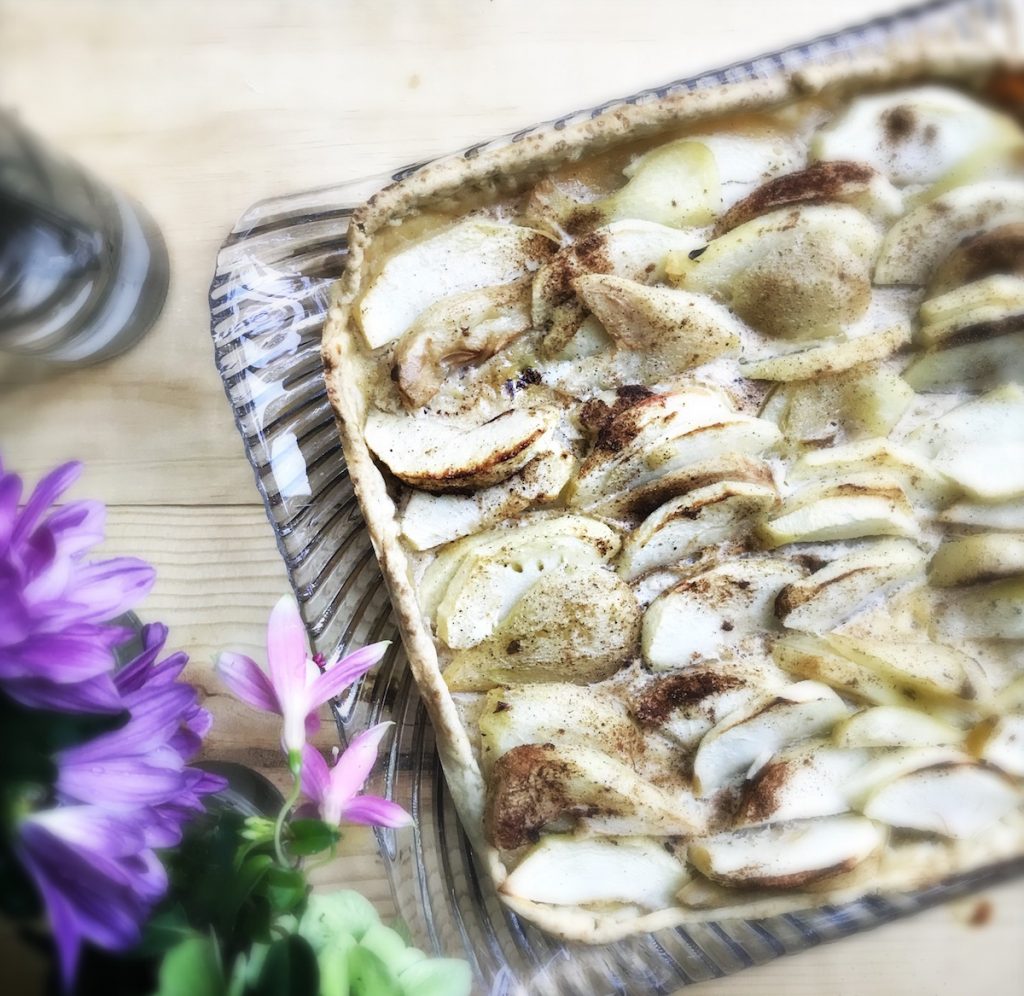
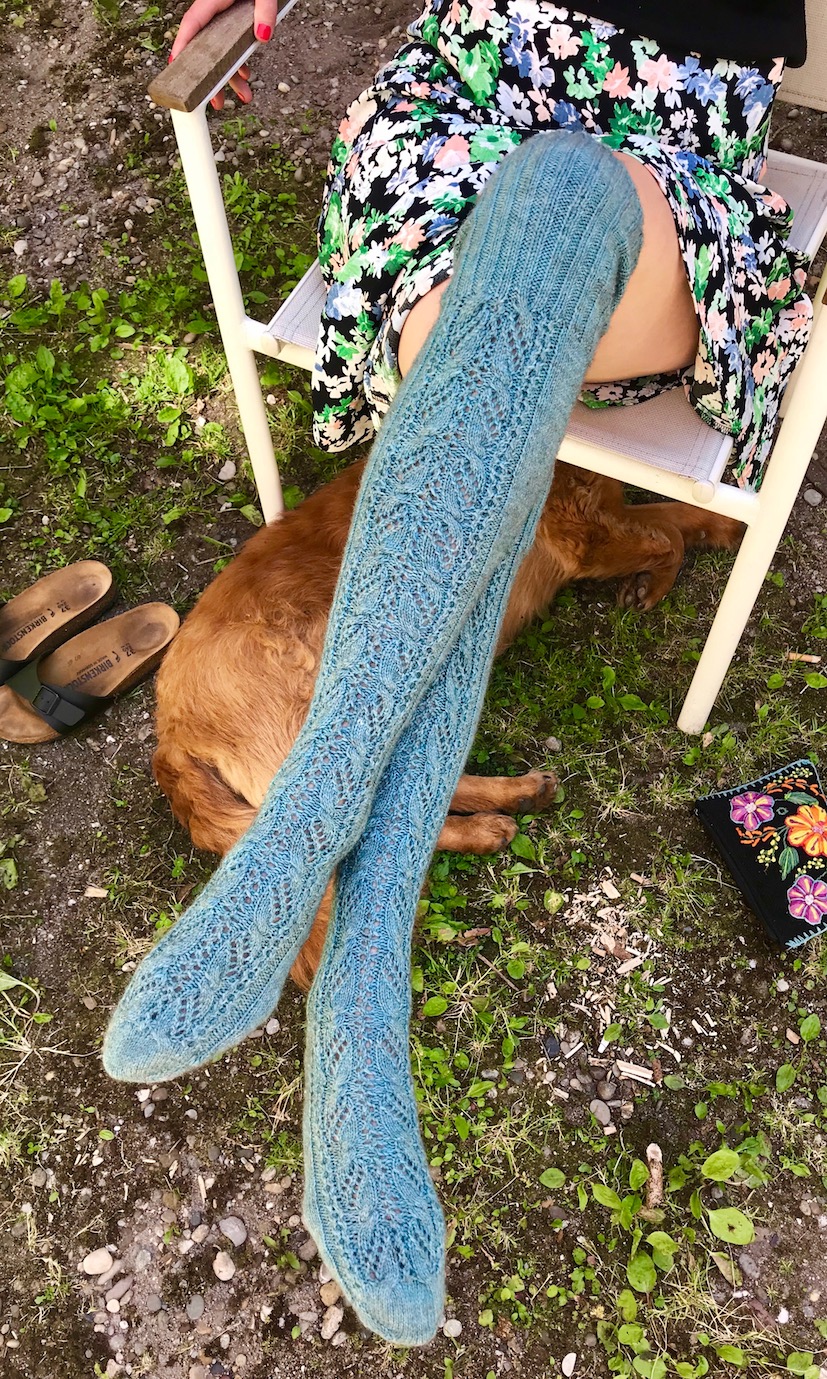
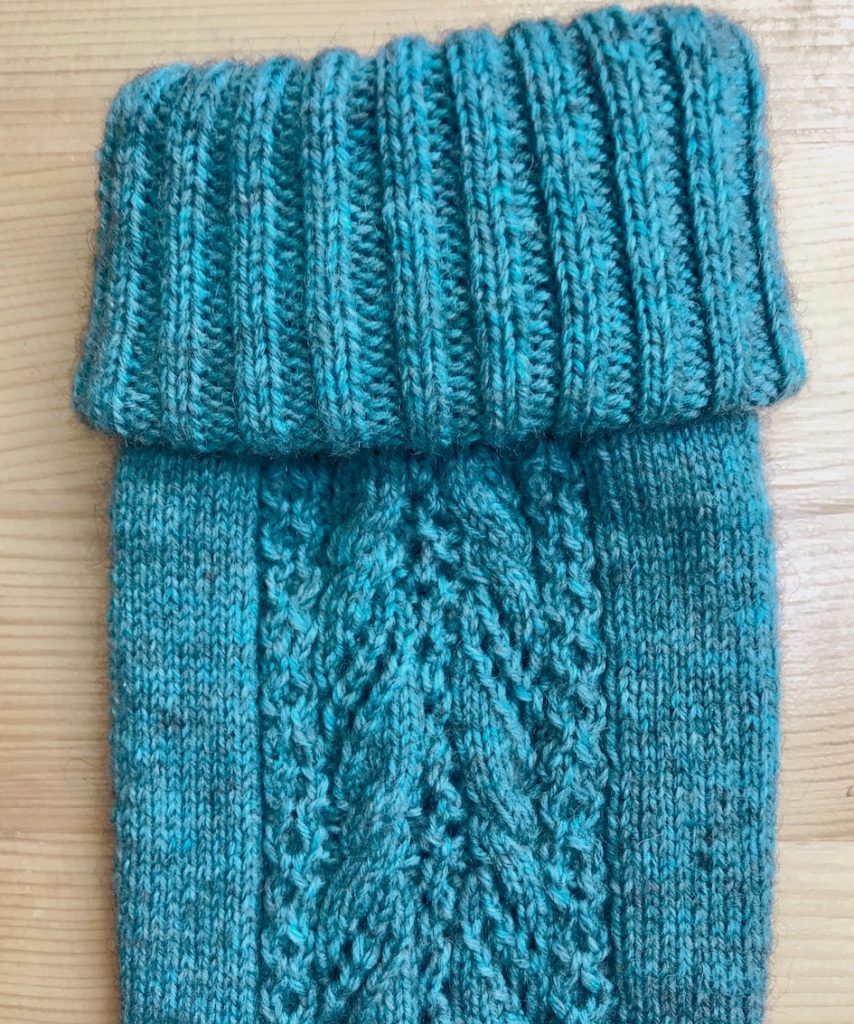
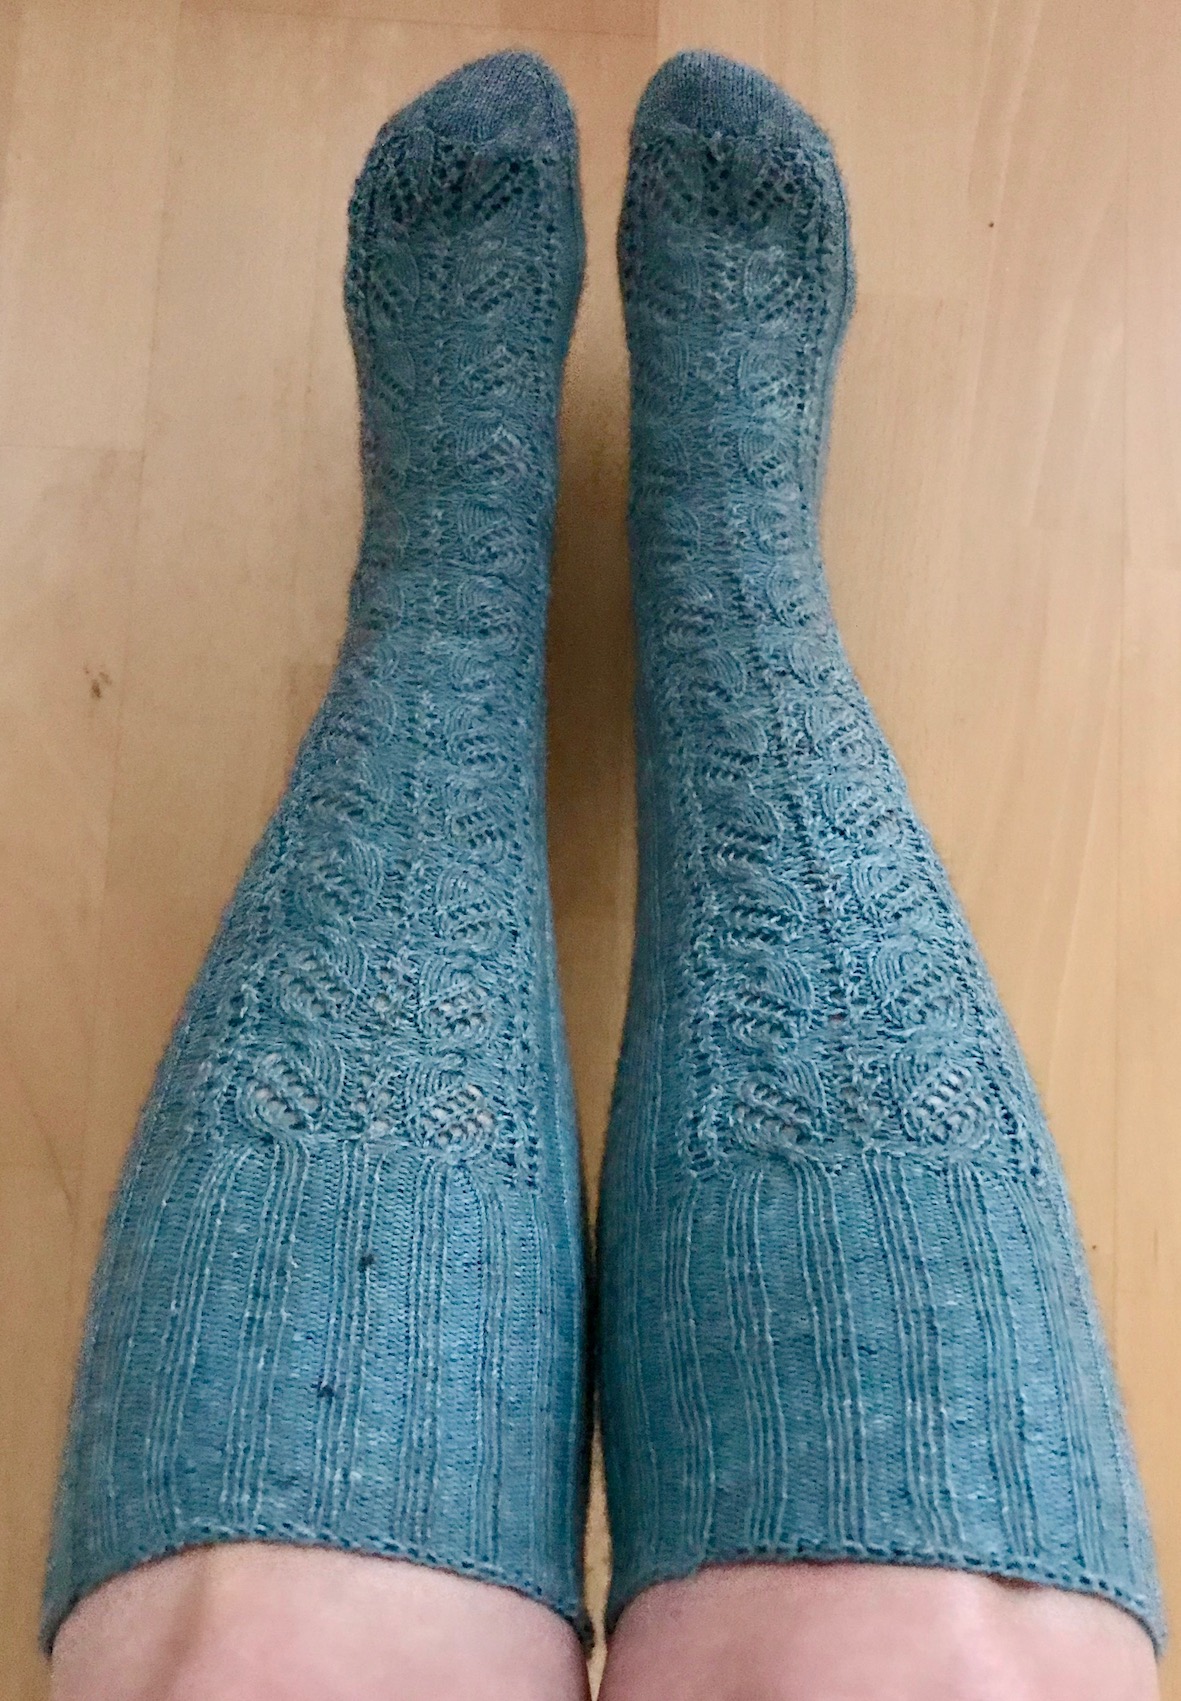
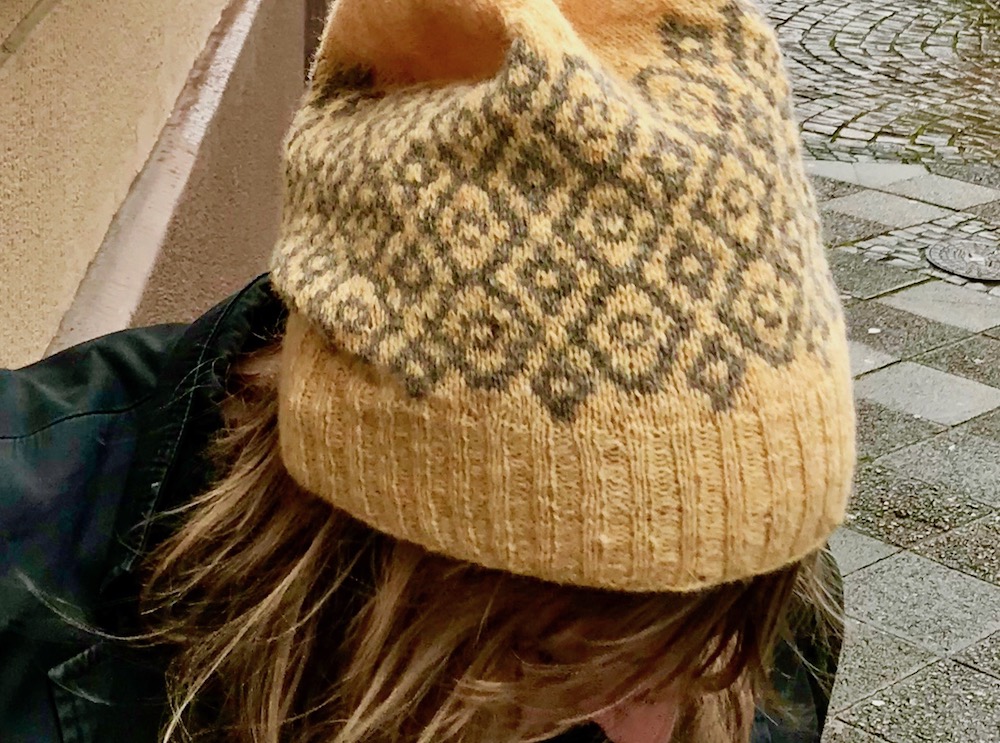
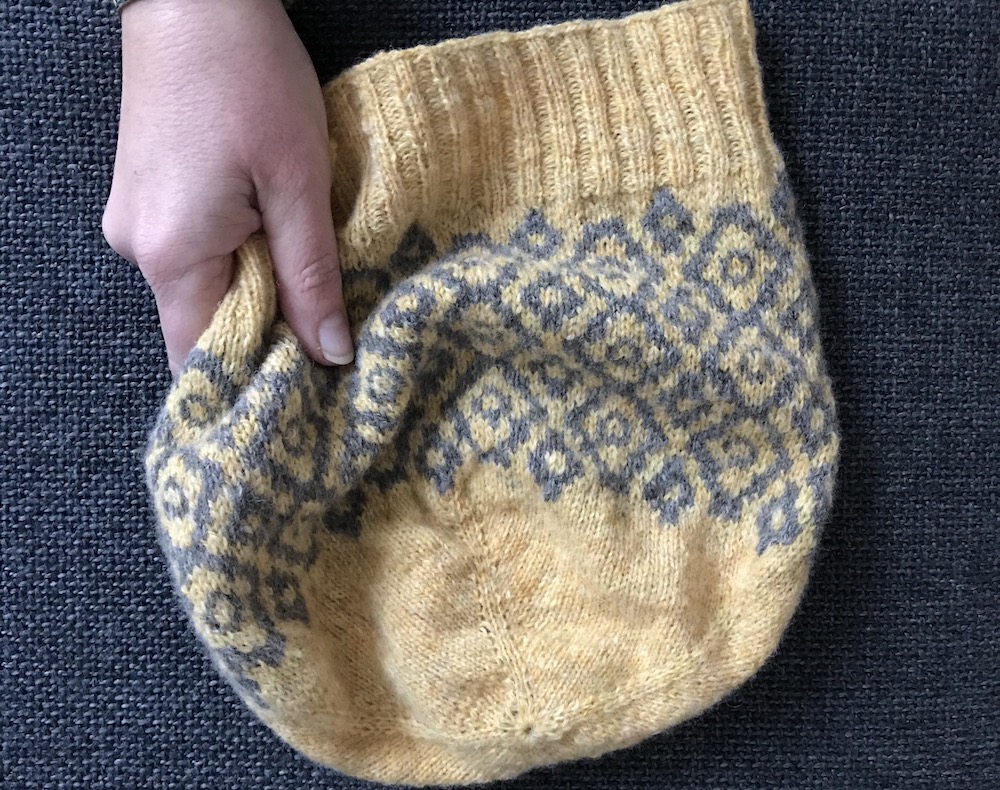
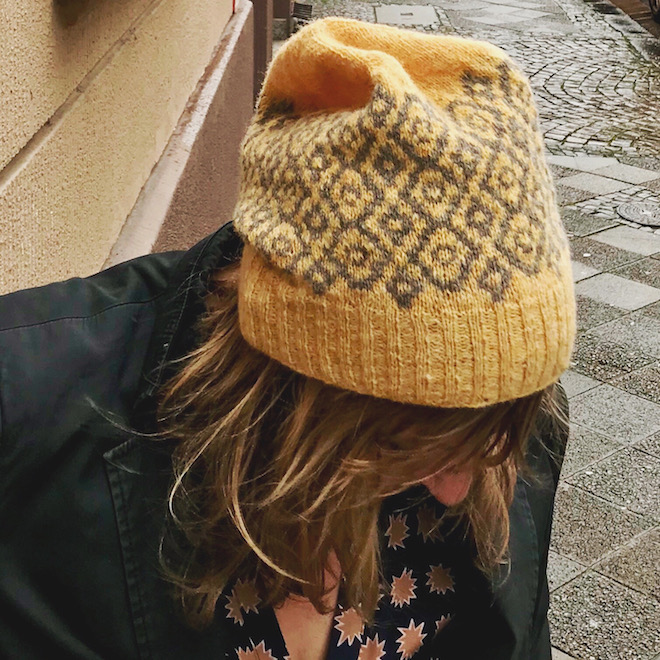
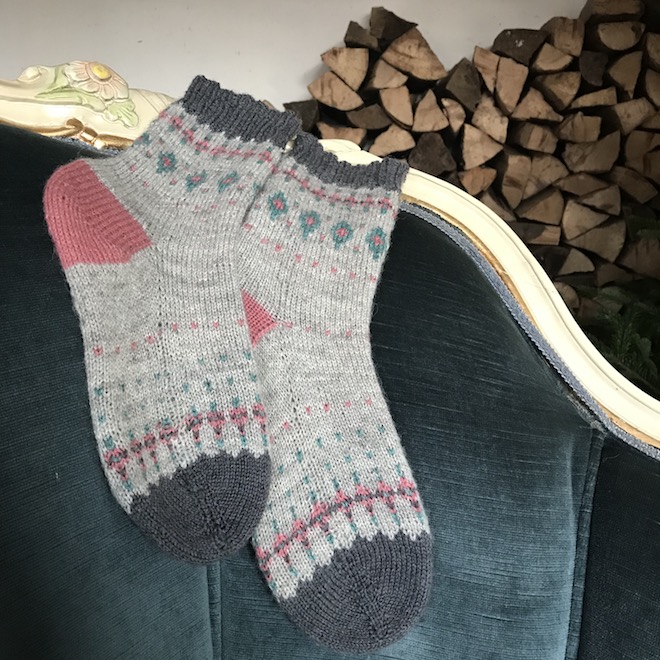
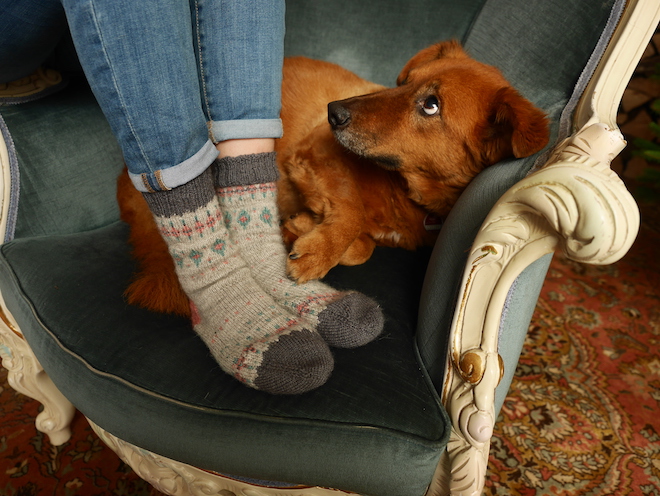
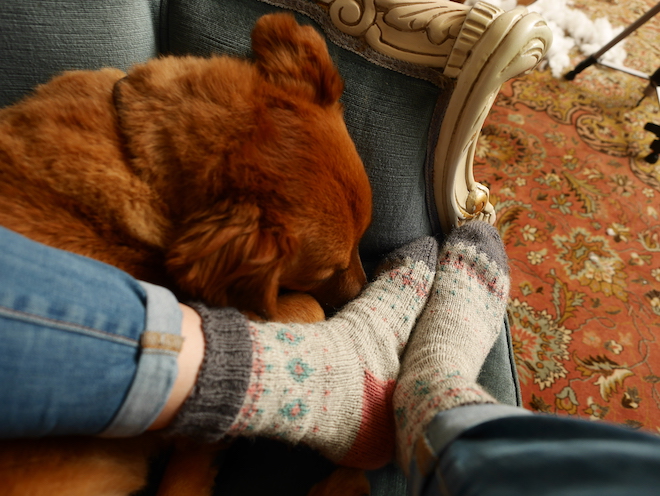
Eventually, I ran out of sock yarn, so I knit socks like these first.

Flatlay of my memory blanket in progress, with a few scraps and an unfinished square lying on a white tableSo I also incorporated other yarn weights: DK with tighter gauge, lace with an extra thread. It works, you have to play around with needle sizes, knit tighter, and maybe also fewer stitches. Also, my original colour scheme got out of hand.

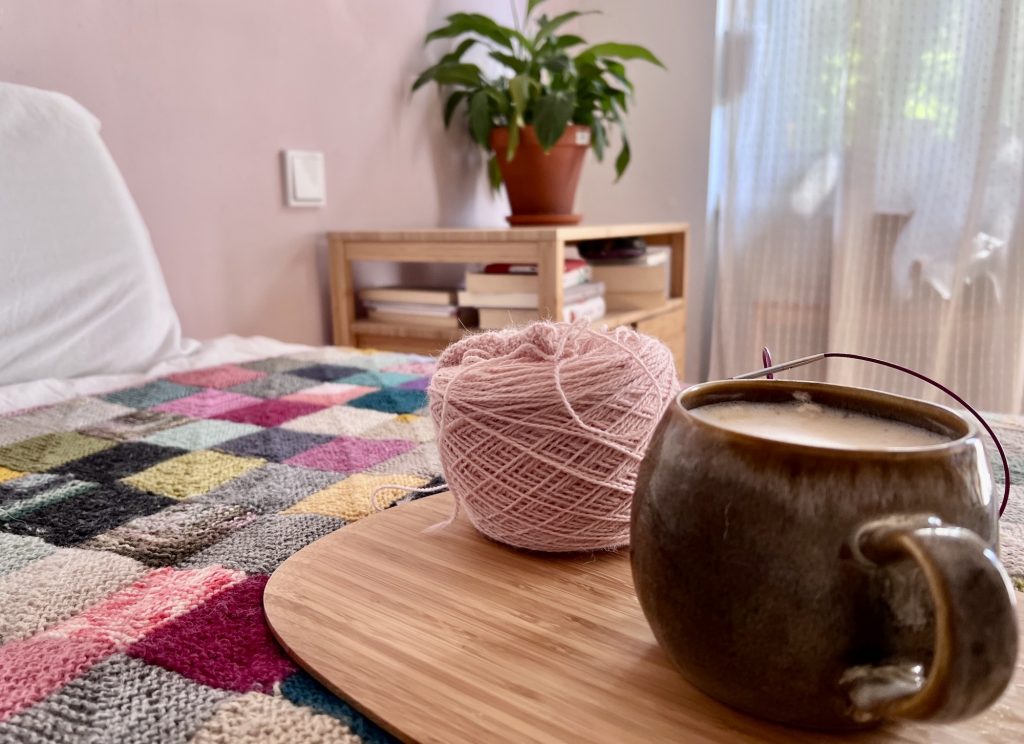
Memory Blanket In the making over the years

I rolled the blanket to take photos, I tried it on my bed to see how long I would have to knit – and to take photos …

Unfinished memory blanket rolled together, lying on a white bedspread, in the background you can see my peace lily.

Still not big enough:Memory blanket covering half of my bed

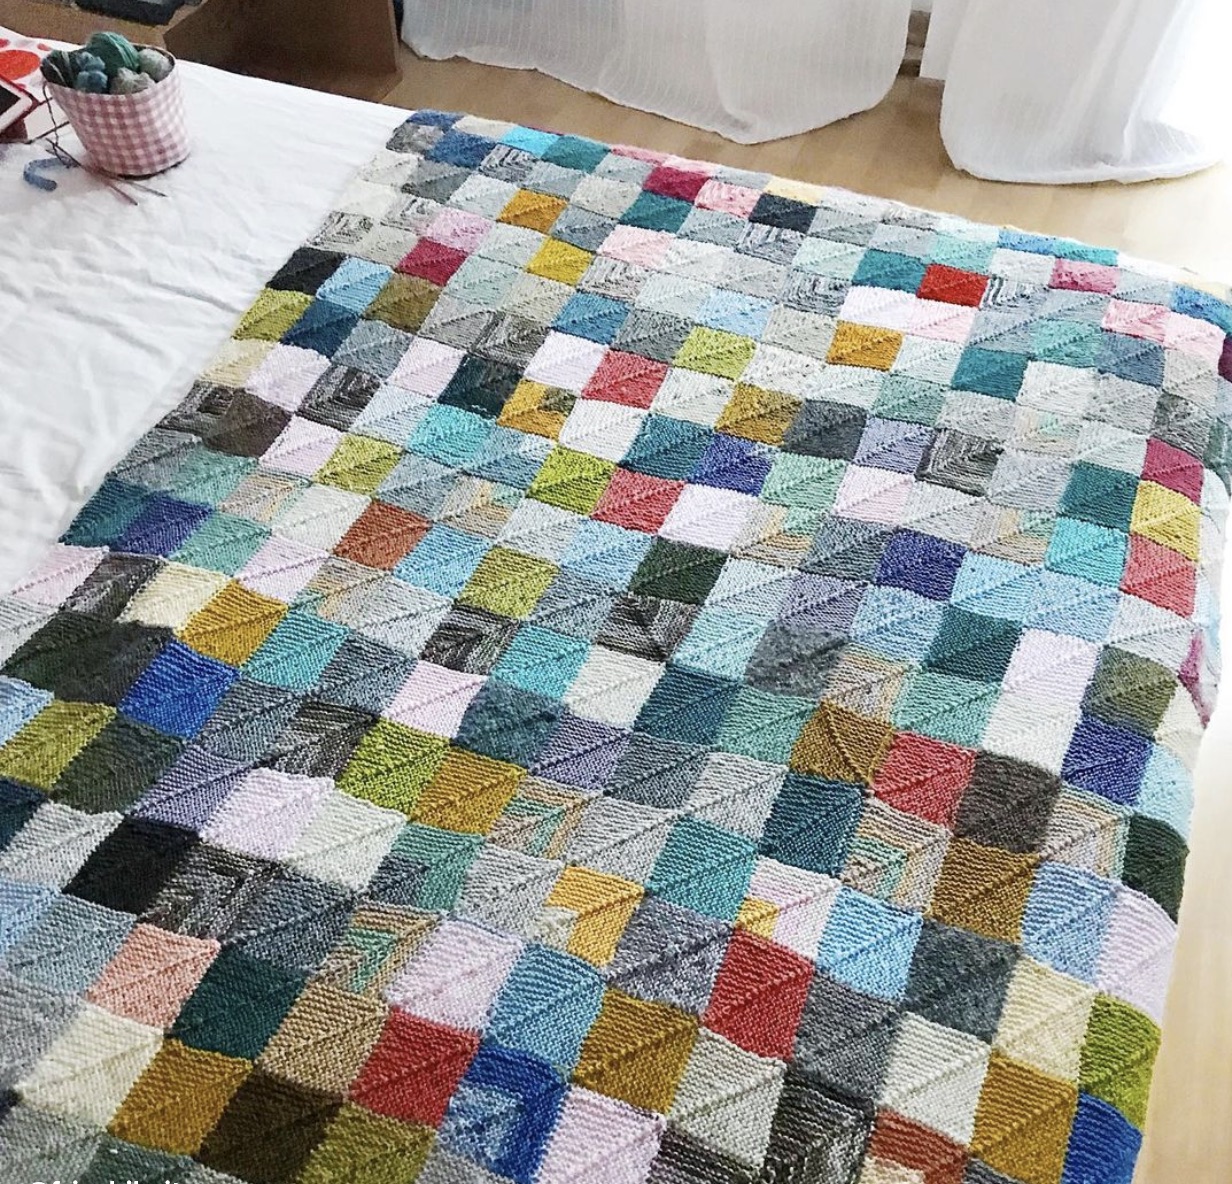
Fun fact: you can also see the Peace Lilly growing …Memory Blanked covery a lot of my bed after four years of knitting. You can see the that the peace lily has been grown as well.

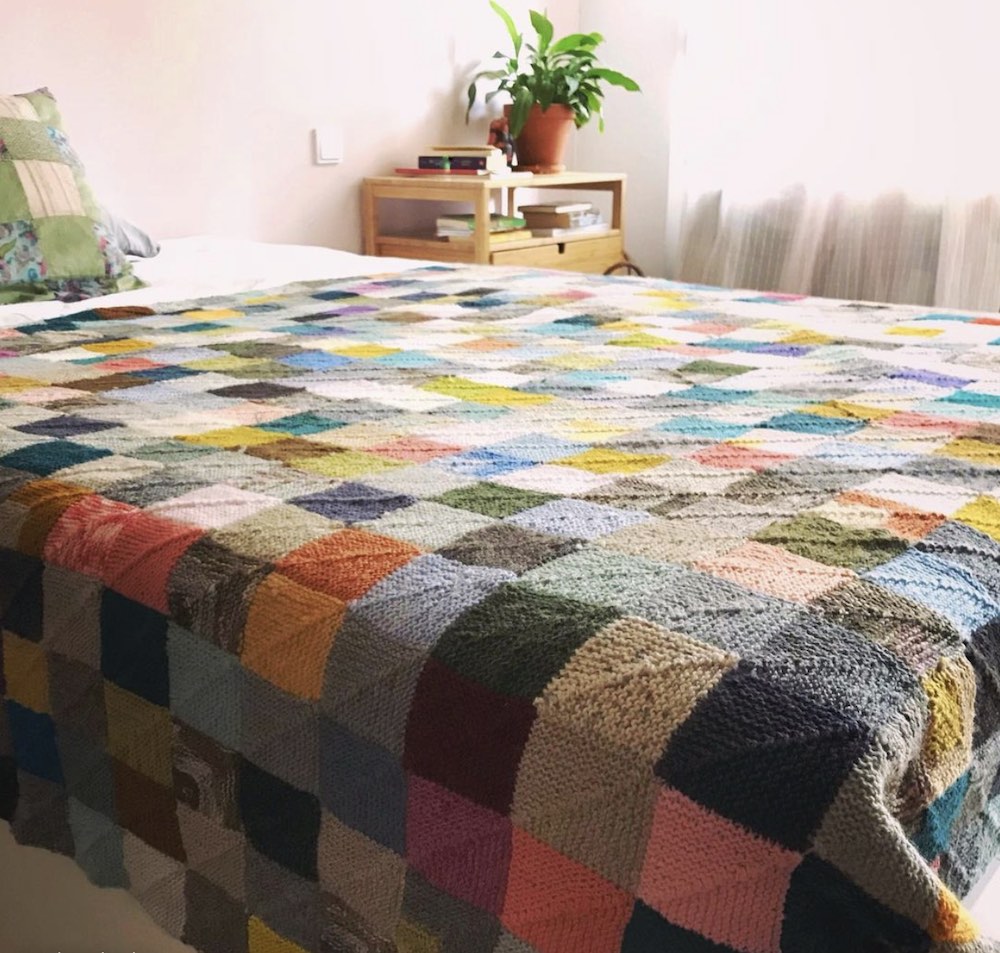
And finally, I decided: Enough! I have to face the boss’s level. Because all the time I knitted the piece, I watched TV, listened to audiobooks, chatted to friends – I was secretly pondering THE EDGING. What colour should it be? Some neutral grey or beige? Should I knit or crochet and how?

In the end, I used a pink yarn that was a rather big leftover from an unravelled scarf. I just don’t wear pink in winter but I have it on my wall. And I would use a simple i-cord.

You can see how I made the i-cord in my Instagram reel – click here!

finished memory blanket rolled together, sitting on a wooden cupboard. Background is white wall, to the right a colourful pastel painting with a woman hugging her child. The colours are matching the blanket

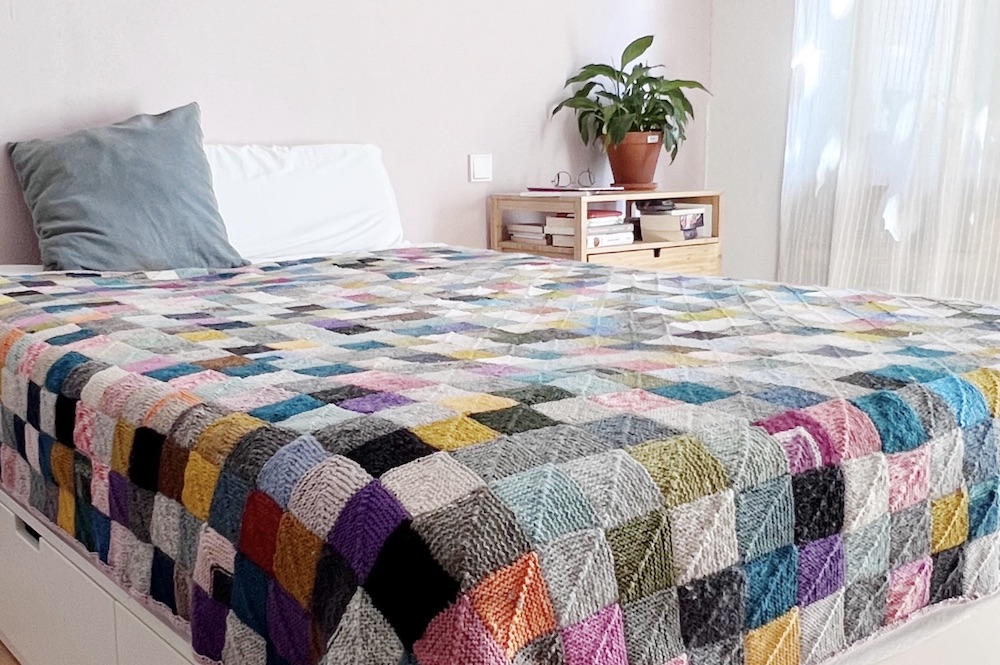
And now this is the blanket in all its glory on my bed.Finished Memory blanket covering my bed. You can see the grown peace lilly in the background as well as my pink wall that corresponds with the pink icord. There is a woven wallhahing with pink as well on the wall.

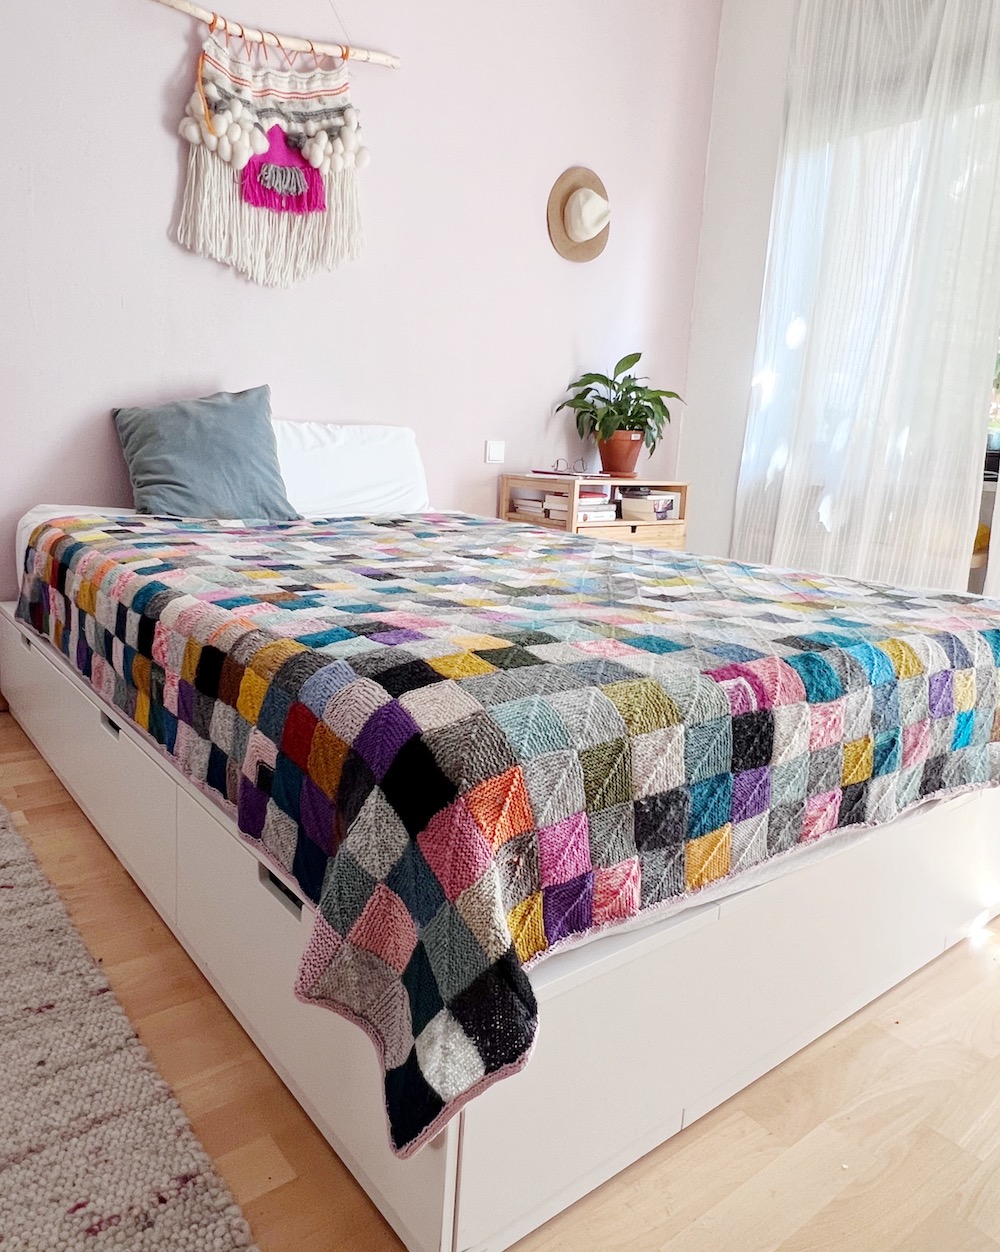
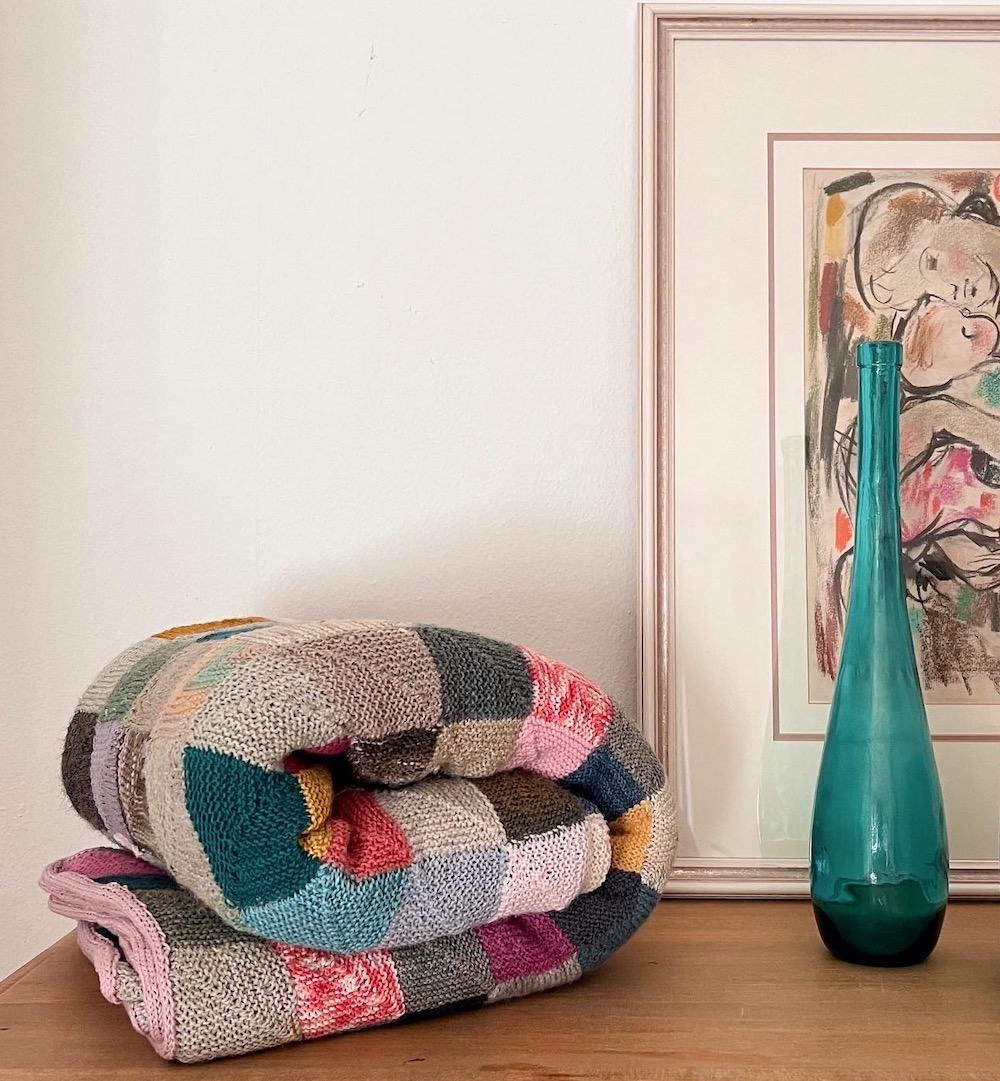
Now that it is finished, I kind of miss knitting it. But, strangely enough, I have so much leftover yarn again, that I might start another one …

close up of cup sitting beneath a yarn cake on the bed that is covered with a memory blanket


Pear Tart – Tarte Aux Poires – A recipe

Pear tart

Fancy a pear tart?  If you like pears, here is a quick and rustic recipe for my Tarte Aux Poires.

For the crust

  • 200 g flour (I use spelt flour, but wheat or a mix of both is fine)
  • 100 g butter
  • 1  pinch of salt
  • 2 table spoons of brown sugar
  • some ice cold water

For the topping

  • 6-7 pears
  • 1 egg
  • 100 ml cream
  • 1/2 tea spoon Pumpkin spice
  • 1 tea spoon of Vanilla sugar

Pear Tart

Mix the ingredients for the crust well together with a food processor or knead dough your hands. If necessary add more water when to dry or some more flour when to wet.

Put in the fridge for half an hour. Prepare your tart pan with butter or parchment paper. Then roll the dough to the size to fill your tart pan.

Pre-bake the crust in the oven for 10 to 15 minutes.

Make the Pear Tart filling

In the meantime peel, core, and cut the pears into slices.

Mix the egg with cream, sugar and pumpkin spice (or just cinnamon if you prefer).

Arrange pear slices on the pre-baked crust. Pour egg-cream mix over them and bake for 20-25 more minutes in the oven (180 °C / 356 °F) until the pears are cooked.

Enjoy.

The crust can be used for pear tart but of course also for apples. I use it for my Tarte Aux Mirabelles as well.

Since it is October – have you seen my recipe for a chestnut quiche? 

Pear tree full of pears

2020 has been **** year for many reasons. But I have never seen pear trees so full of fruits like this autumn.

Salvia – knitted knee-high socks for all bodies

Knitted knee highs

Knitted knee-high socks right now? What? I know, it’s August and in the Northern hemisphere, it equals high temperatures. And while I am writing it is maybe the hottets day in Germany this year. But sock knitters will knit regardless. Salvia is a comfy pair knitted knee-high socks that will be perfect when the temperatures fall again. Knitted knee-high socks on thin legs where the reach over the knee

The knitted knee-high socks feature a chic lace and cable panel on the front. The socks are worked from the toe up with a gusset. The heel is shaped seamlessly with short rows.

The legs are shaped so they fit calves of all sizes because all bodies are different! After the heel, the pattern gives instructions on how to work on for your specific calf circumference. You can work more increases or decreases for your calf/leg shaping in the stockinette section of the back leg as well as choose your own length. It’s easy – since you can try on the knee socks and make adjustments accordingly.

How to wear your knitted knee-highs

Wear your Salvia knee-high socks with a skirt or dress and heavier boots. Either scrunched down or pulled up to the knee. Or if you knit them longer you can use them as over-knees.

Knitted knee high socks in front of a brick wall

Salvia pattern is available in my Ravelry Store. There you can find a few gorgeous pictures of my test knitters, too.

And for all people that are facing difficulties with their new design: it is also the first pattern I uploaded to Payhip.

Detail of Salvia knitted knee-high socks

Knitted knee-high socks on bigger calves to show size inclusion

The pattern was test-knitted thoroughly as usual by Frauke from Urban Yarning.

A big thank you to my test knitters – you can find knitted Salvia socks on Ravelry or on Instagram – here are a few photos in their feeds: @lostinmagicloop, @piaknits, @linmal55, @katamare1, @moragduller


Warm Heart Mitts: Designed and knitted for Operation Social Justice

Knitted mitts with hearts

Warm Heart Mitts are a fun knit and a great stash buster. You can use all your leftover sock yarns to make a pair of colourful mitts. Knit either two of a kind or two different ones. They are worked in a blast and you will learn (if you don’t already know):

  • How to make jogIess joints when changing the colours at the end of the round.
  • How to bobble. The pattern explains how to make these cute bobbles right at the cuff. ??????

Cast on with bobbles

Warm Heart Mitts: Hand knitted & fingerless

The body of Warm Heart Mitts is long, wear them pulled up …

or scrunch them down …

Warm Heart Mitts are designed for a cause

Not only the are sustainable because you can use up your leftovers, but they are designed to support Operations Social Justice which was initiated by Gamercrafting on Instagram. How? Why? To kill the trolls with kindness. To take a stand against hate, racism and ignorance. Social Justice is a good thing. It’s worth fighting for.

Or in Gamercrafting’s words: 

Social justice: the fight for equity in rights and opportunities. When did justice become something to malign and mock? Here at GamerCrafting Yarns, we think it’s important to fight for what’s right. It’s important to be kind, and it’s important to drown hate with love.

Nothing to add, except:

I will donate all the profit from the pattern to Arrival Room, a project space designed for migrants and locals in Saarbrücken. The aim is to bring people together through creativity and culture. So please purchase the pattern and knit you own, crazy version, use all the colours of the rainbow. And be kind! Check out the Hashtag #OperationSJW on Instagram for more kind projects and leave the people some love.

The pattern was tech edited by Frauke from Urban Yarning who already edited Sparkz and test knitted by a kind Ravelers and Instagrammers. You will find their projects tagged with #warmheartmitts.


Ravelry Link: Knitting pattern mitts Warm Heart

Knitted bobbles at the cuff Knitting mitts, drinking coffee

Thanks to the kind Instagrammers who tested the pattern for me. I don’t have pictures from all of you, but here are a few:

Here is Patricia’s cuff with very neat bobbles!

Warm Heart mitts by Patricia

Gabriel used bright orange and crazy pink.

Gabriels warm heart mitts

Sigrid chose colours that are totally in my thing!

Sigrid's warm heart mitts

Thanks also to Jennifer, who did almost a complete tech edit with her test knit. .. I don’t have her photos but her project pics can be found here.

These are rough times. Take care, stay healthy, stay safe and care for your neighbours. And make a donation to a charity if you can: It’s always the weak, the marginalized which are hit hardest! Sending you ?!

Glazed Tiles Hat: Knit your colourwork hat top down

Glazed Tiles Hat

Glazed Tiles features a geometric colourwork pattern that is inspired by the rooftops in the Burgundy town Dijon. It is knitted from the crown down, so you will not have to decide on the size right away. Indeed you could start with any yarn and a gauge that is not exactly the one indicated and stop when the top is large enough for your head.

You can find the hat pattern with all the information on yarn weight, gauge and techniques in my Ravelry store (Click).

Prefer knitting socks? Check out Sparkz!

Colourwork socks: Sparkz (joy?)

Knitted colourwork socks

After all my lace or cabled socks that I knitted toe-up, I felt a bit of stranded colourwork would be nice – to spark some joy. Plus I had to knit from my stash: I purchased some squishy sock yarn from John Arbon Textiles at the Edinburgh Yarnfest back in March. I got three colourways with the nice names Bulderin Clouds, Mackerel Sky and Mizzle (I am really celebrating these nature-related names). Plus, I had a perfect pink left-over from my Magnoliaz – a sock pattern I released last year.

Sparkz is my latest sock pattern. It has just the right amount of colourwork to keep all the knit stitches interested. Only maximum two colours in a row, so that you won’t get tangled up with too many strands over your knitting fingers. When a third colour is needed, I used the slipped stitch trick.

The pattern was tech-edited by Frauke from Urbanyarning and I really have to thank her for all the useful tips. She suggested not to limit the instructions to magic loop (which is my preferred method of sock knitting). So you will find clear instructions for your preferred method, whether you knit with a circular, 4 or 5 dpns or 3 flexible needles.

Do you like Sparkz? Head over to Ravelry, download and knit them. I am sure they will spark joy.

All my sock patterns can be found on Ravelry.

[Disclaimer: Post mentions brands and businesses. No one paid me for that. Advertisements or PR-Samples would be flagged as such.]

Outtakes

WTF are you doing? Carl was not pleased when he had to share the fauteuil très chic when we took pictures of Sparkz socks.  Also, let me assure you the socks have a very good fit, they are knit 3 sizes to big for the model.


Morningside Socks – Knit with the Edinburgh Yarnfest in mind

Flatlay of Morningside lace socks.

The post for my latest sock design Morningside socks is, in fact, a bit overdue. But it was a long summer and the time spent mostly outside. I also had a bit of an Instagram break which means I didn’t post as often as I usually do.

The inspiration for Morningside socks dates back to the Edinburgh Yarn Festival in March 2019. I met Saskia from Ovis Et Cetera for the first time in person although our Instagram acquaintance dates back to 2015. Anyway, I got a skein of her Corriedale sock yarn from the booth she hosted together with Saskia from Ja Wol Rotterdam.

Hmm, quite unintentionally I chose that particular colour that reminded me of the Edinburgh houses. Strange, as most of the other skeins I bought at the Yarnfest were blue, teal or turquoise (I tend to buy the same colours each time). So I decided to cast on a pair of socks right away.

Blooming tree and Edinburg houses
Skein of greige yarn held against a wall of the same colourway.
Morningside socks are reminding me of Edinburg

Not only the pattern and the yarn recalls Edinburg but the geometric lace pattern makes me think of the rooftops on my way to the Edinburgh Yarnfest. My friend Stephanie who is kindly hosting me there when I visit lives a 25-minute walk away from the Corn Exchange and I usually take the stroll along Union Canal. I love the houses, the trees and the light very much.

Edinburgh  Rooftops
Flatlay of Morningside Socks and a cup of tea.
Morningside Socks are on Ravelry

Morningside Socks are knitted from the toe up starting with the fabulous Judy’s Magic Cast-on. The lace part really is not difficult, it is an easy repeat However, it’s not quite tv-knitting, it needs a bit of attention. ?

You can find the pattern for Morningside Sock and quite a few project pictures on Ravelry. Or on Instagram where I occasionally check what you are making with my patterns, too. Big ?for the knitters who share!

Immersion Shawl.

View from the back. Dark haired girl stretching her arms to show Immersion shawl. Background is a wall with graffiti.

My new design Immersion Shawl is inspired by all the yoga practice I did during winter. I wanted a shawl to wrap myself in completely, either at the beginning of the yoga class or during meditation at the end. A cosy, protecting wrap to feel good.

The shawl is worked from the top down and with broad, textured blocks. If you like to explore different stitch patterns, here you go. First, there is a block of garter stitches to get in the mood. The next pattern block is stockinette with tiny bobbles. I can’t get enough of knitted bobbles, really. I already used them in my last design (oh, and for the record: they are still in my head for the next one … ). Anyway, Immersion Shawl ends with a large lace border and a few rows of garter stitch.

Immersion shawl wrapped around neck of Chinese girl smiling to the camera. In the background cityscape with river.

Yarn matters //Ad

[Full disclosure: I applied for The Fibre Co.’s yarn support programme and The Fibre Co. generously provided me with yarn support for this particular project.]

Handknitted Shawl wrapped around the neck of white girl wearing sunglasses. In the background a wall with graffiti.

I wanted the shawl huge – so I was looking for a DK yarn that would give a very good drape. The Fibre Co. Acadia is a shiny blend of Merino, alpaca and silk noil. The different fibres react differently in the dye pot, so the yarn has interesting shades and a tiny bit of a tweedy look thanks to the silk.

Immersion Shawl for two

I originally wanted to take the photos in my friends Yoga Studio to match the inspiration for the design. Then, all of a sudden, it was spring and for a non-professional photographer with a basic camera, it is much easier with natural light. So I decided to go to Saarbrücken’s small port and take photos in the sun. Thank you, Ida and Franzi for letting me take your pictures with my knitwear. You are the best!

To girls wrapped in Immersion Shawl.

The pattern for your Immersion Shawl can be found in my Ravelry store. Click here for all the missing information (gauge, needles, etc.). And check out the projects of my test knitters, they did a great job with the bobbles (not only).

Karamell Cowl.

Karamell is a toasty cowl for a knitter who wants to explore different techniques in one project. Colourwork, mini bobbles, structure and stockinette: Karamell has it all. There is also a broader picot edging. It is asymmetrical shaped – for a better drape. Here is Karamell modelled by my radiant neighbour at an impromptu photo shoot on her 18th birthday. 

Karamell and matching vintage Tweed jacket

When I wanted to take another more clear picture for the cowl today, I realised that I just had the right jacket to style it. It is a from a vintage tweed suit my mother made. She gave the skirt and the jacket to me lately to sell it second hand, which I couldn’t convince me to do yet. In fact, right now I am very happy I didn’t.

It was made by the end of the late 60ties, early 70ties. The fabric is a woolly tweed and it was made for the cooler season. I remember it well. My mother is a trained seamstress. She started working when she was 14 which is incredible. I imagine her walking 3 km in the dark in the morning to get to the factory where she worked and feel very spoiled.

She made a lot of dresses for me when I was a kid. I remember being very impatient when I had to stand still when she measured the hemline. Or the frustration when I had to fit a dress which was only pinned together. Oh, that pins! I hated them. I liked the dresses, though. She also taught me how to sew my own clothes. However, I remember that it wasn’t very easy to match her high standard. But hey, look at the pocket detail:

There is so much perfection in that suit. Maybe it would be worth to write an extra post. And you know what, I have another suit as well, Chanel-style. And a really cool sixties dress. Too bad my mother is a tiny person and that there is no way that I will ever fit into these clothes.

Back to knitting – and the cowl

Okay, I got distracted a bit. Not every post is written as planned, but hey, my mom will like it. Back to the cowl: Karamell is knit with Ulysee from De Rerum Natura with 3.75 mm needles. If you want to knit Karamell, you can find the pattern  and all the related information on Ravelry by clicking the link. I promise you a fun knit.

Mimi – A stranded colourwork hat and a hike in the Vosges

It has been a while that I published something on this website. I still owe myself a post on my trips to New York and Lisboa earlier this year. On a few crafty people I met and the crafty places that I wanted to blog about.  But since I am working nine to five again there is less time for knitting, writing and taking pictures … and yes, I miss it. So this week a week of holiday, free, no trip planned. My hands are itching to knit, weave and plan some posts for this site.

Meet Mimi and my friends

Hey, what a summer here in the Northern hemisphere! I enjoyed every minute. And yes, I also knitted a few things. And, with fall approaching, there is actually a new design. I can show you here. Voilà: Mimi, a cute little hat with geometric flowers. It has a longer brim with an interesting ribbing detail with twisted stitches. I uploaded the pattern to Ravelry last week. 

Mimi

Mimi is knitted with De Rerum Natura Ulysee, a soft but rustic sports weight yarn. I like how the fibres bloom when washed an blocked. The colourwork part flew off my needles – so I decided to knit a second hat in a different colourway, with less contrast.

Mimi in rose and grey

While some very kindred Instagrammers offered to test my pattern and knitted their version of Mimi, I convinced my dear long-time real-life friends Julia and Elke that they are just the right models for the hats. So, during our hiking trip to the Vosges, we took some pictures high up on the Route des Cretes.

friends

It was a glorious day, not really hat weather. We took an approx. 18 km hike from Col de la Schlucht to Gazon de Faȋte which is absolutely amazing. The fermes auberges on the way are highly recommended. Try their cheeses plus a bottle of Cremant or a Gewürztraminer. Life is even better. We definitely will return for another hike to the Vosges, soon.

Want to see a few pictures?

Le Tanet

Heather.

Rose hip

Route de Cretes

Ah, and about Mimi:

You can find more details (yardage, needles sizes, gauge and pictures of some of my test knitters) in my Ravelry store. And what would be Mimi without Musetta? There will be matching mittens soon, too. The pattern for Musetta, a pair of fingerless mittens will be released this week. I will add a picture here later.